 Welcome to Mish's Corner of the Web
Retropie Handheld Console -- Retropie on Pi 3
May to June, 2025
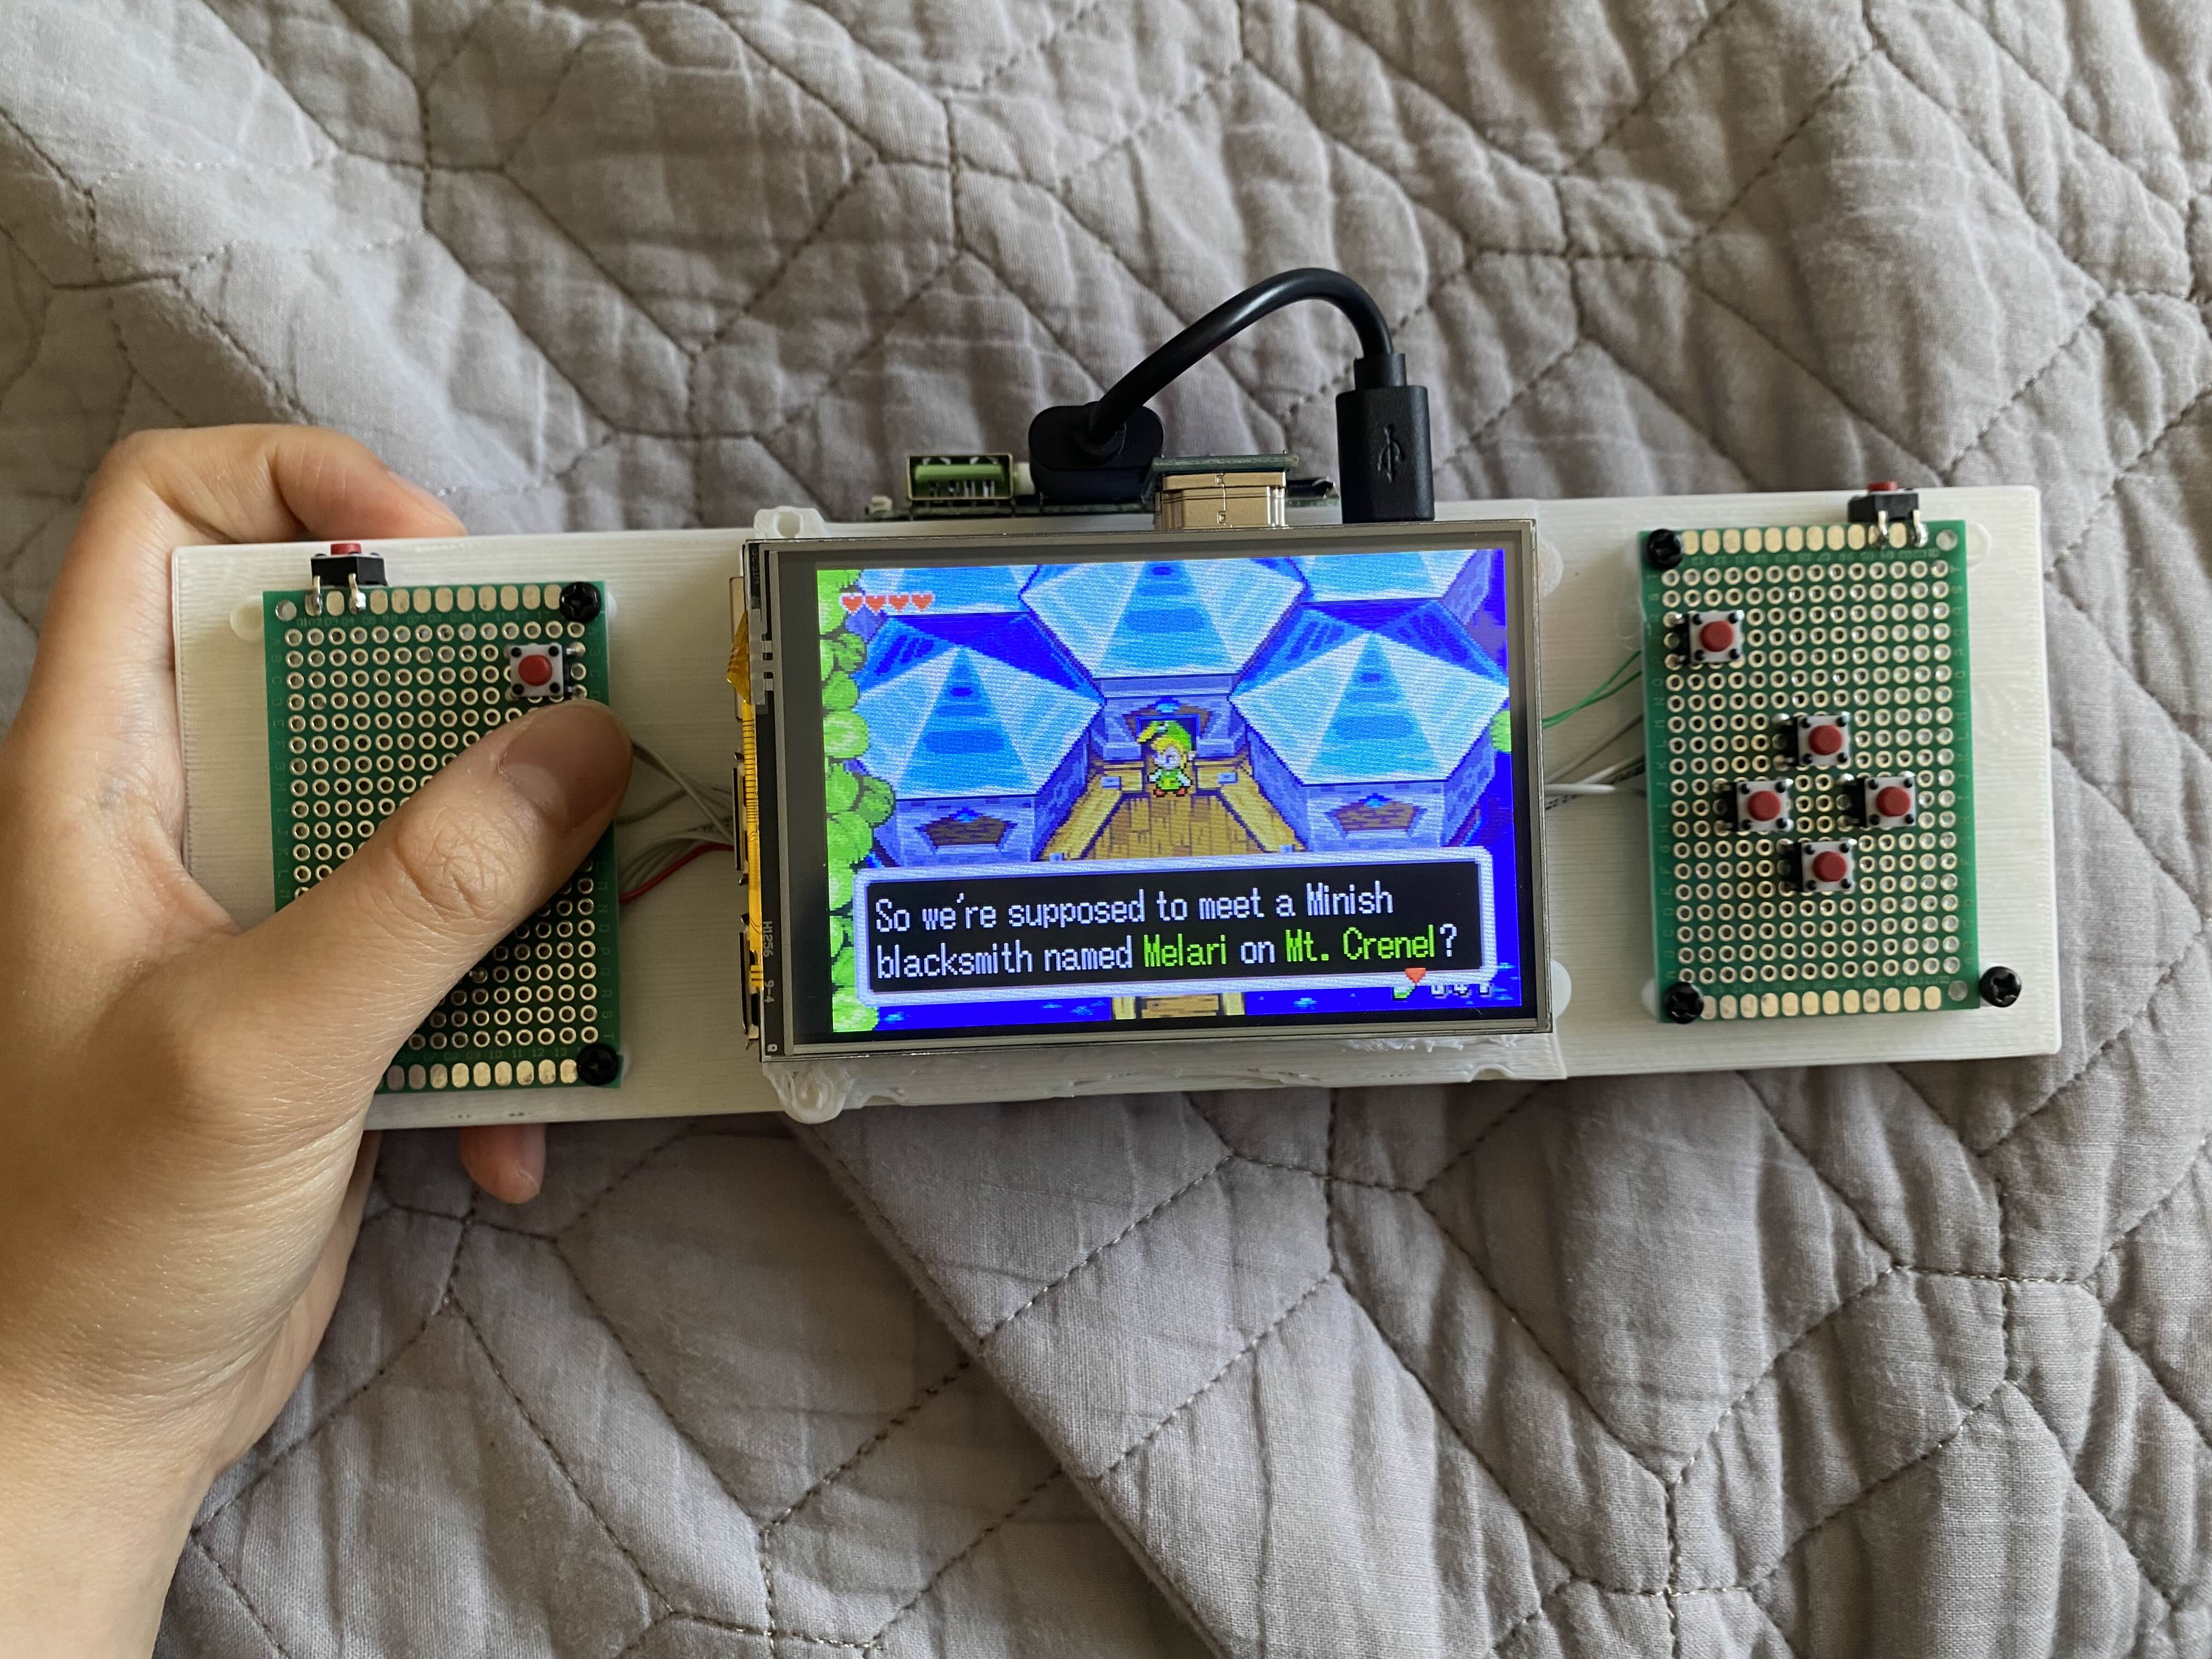
I love the old Pokemon games, especially Emerald. However, my first experience with the game was not on a traditional console. As any 13 year old would do in their free time, I pirated the game through an iPhone emulator and played it with my friends during band practice. Long story short, I never owned a Gameboy Advanced or the game, but those pirated experiences gave me nostalgia that I crave to relive. Nowadays, a Gameboy Advanced cost way more than it should, not to mention the prices of games like Pokemon. So, just like how any 23 year old spend their unemploymentship, I built my own emulation console to run some ROMs that I somehow obtained!
How I got there:
I flashed an image of Retropie onto a micro SD card and plugged it into an old Raspberry Pi 3 I had laying around the house for years. That was the easy part.
I could have stopped there and just plugged a monitor and a controller to play, but I am extra. I ended up turning it into a handheld console.
This process involved a lot of researching, experimenting, and wasting moneying.
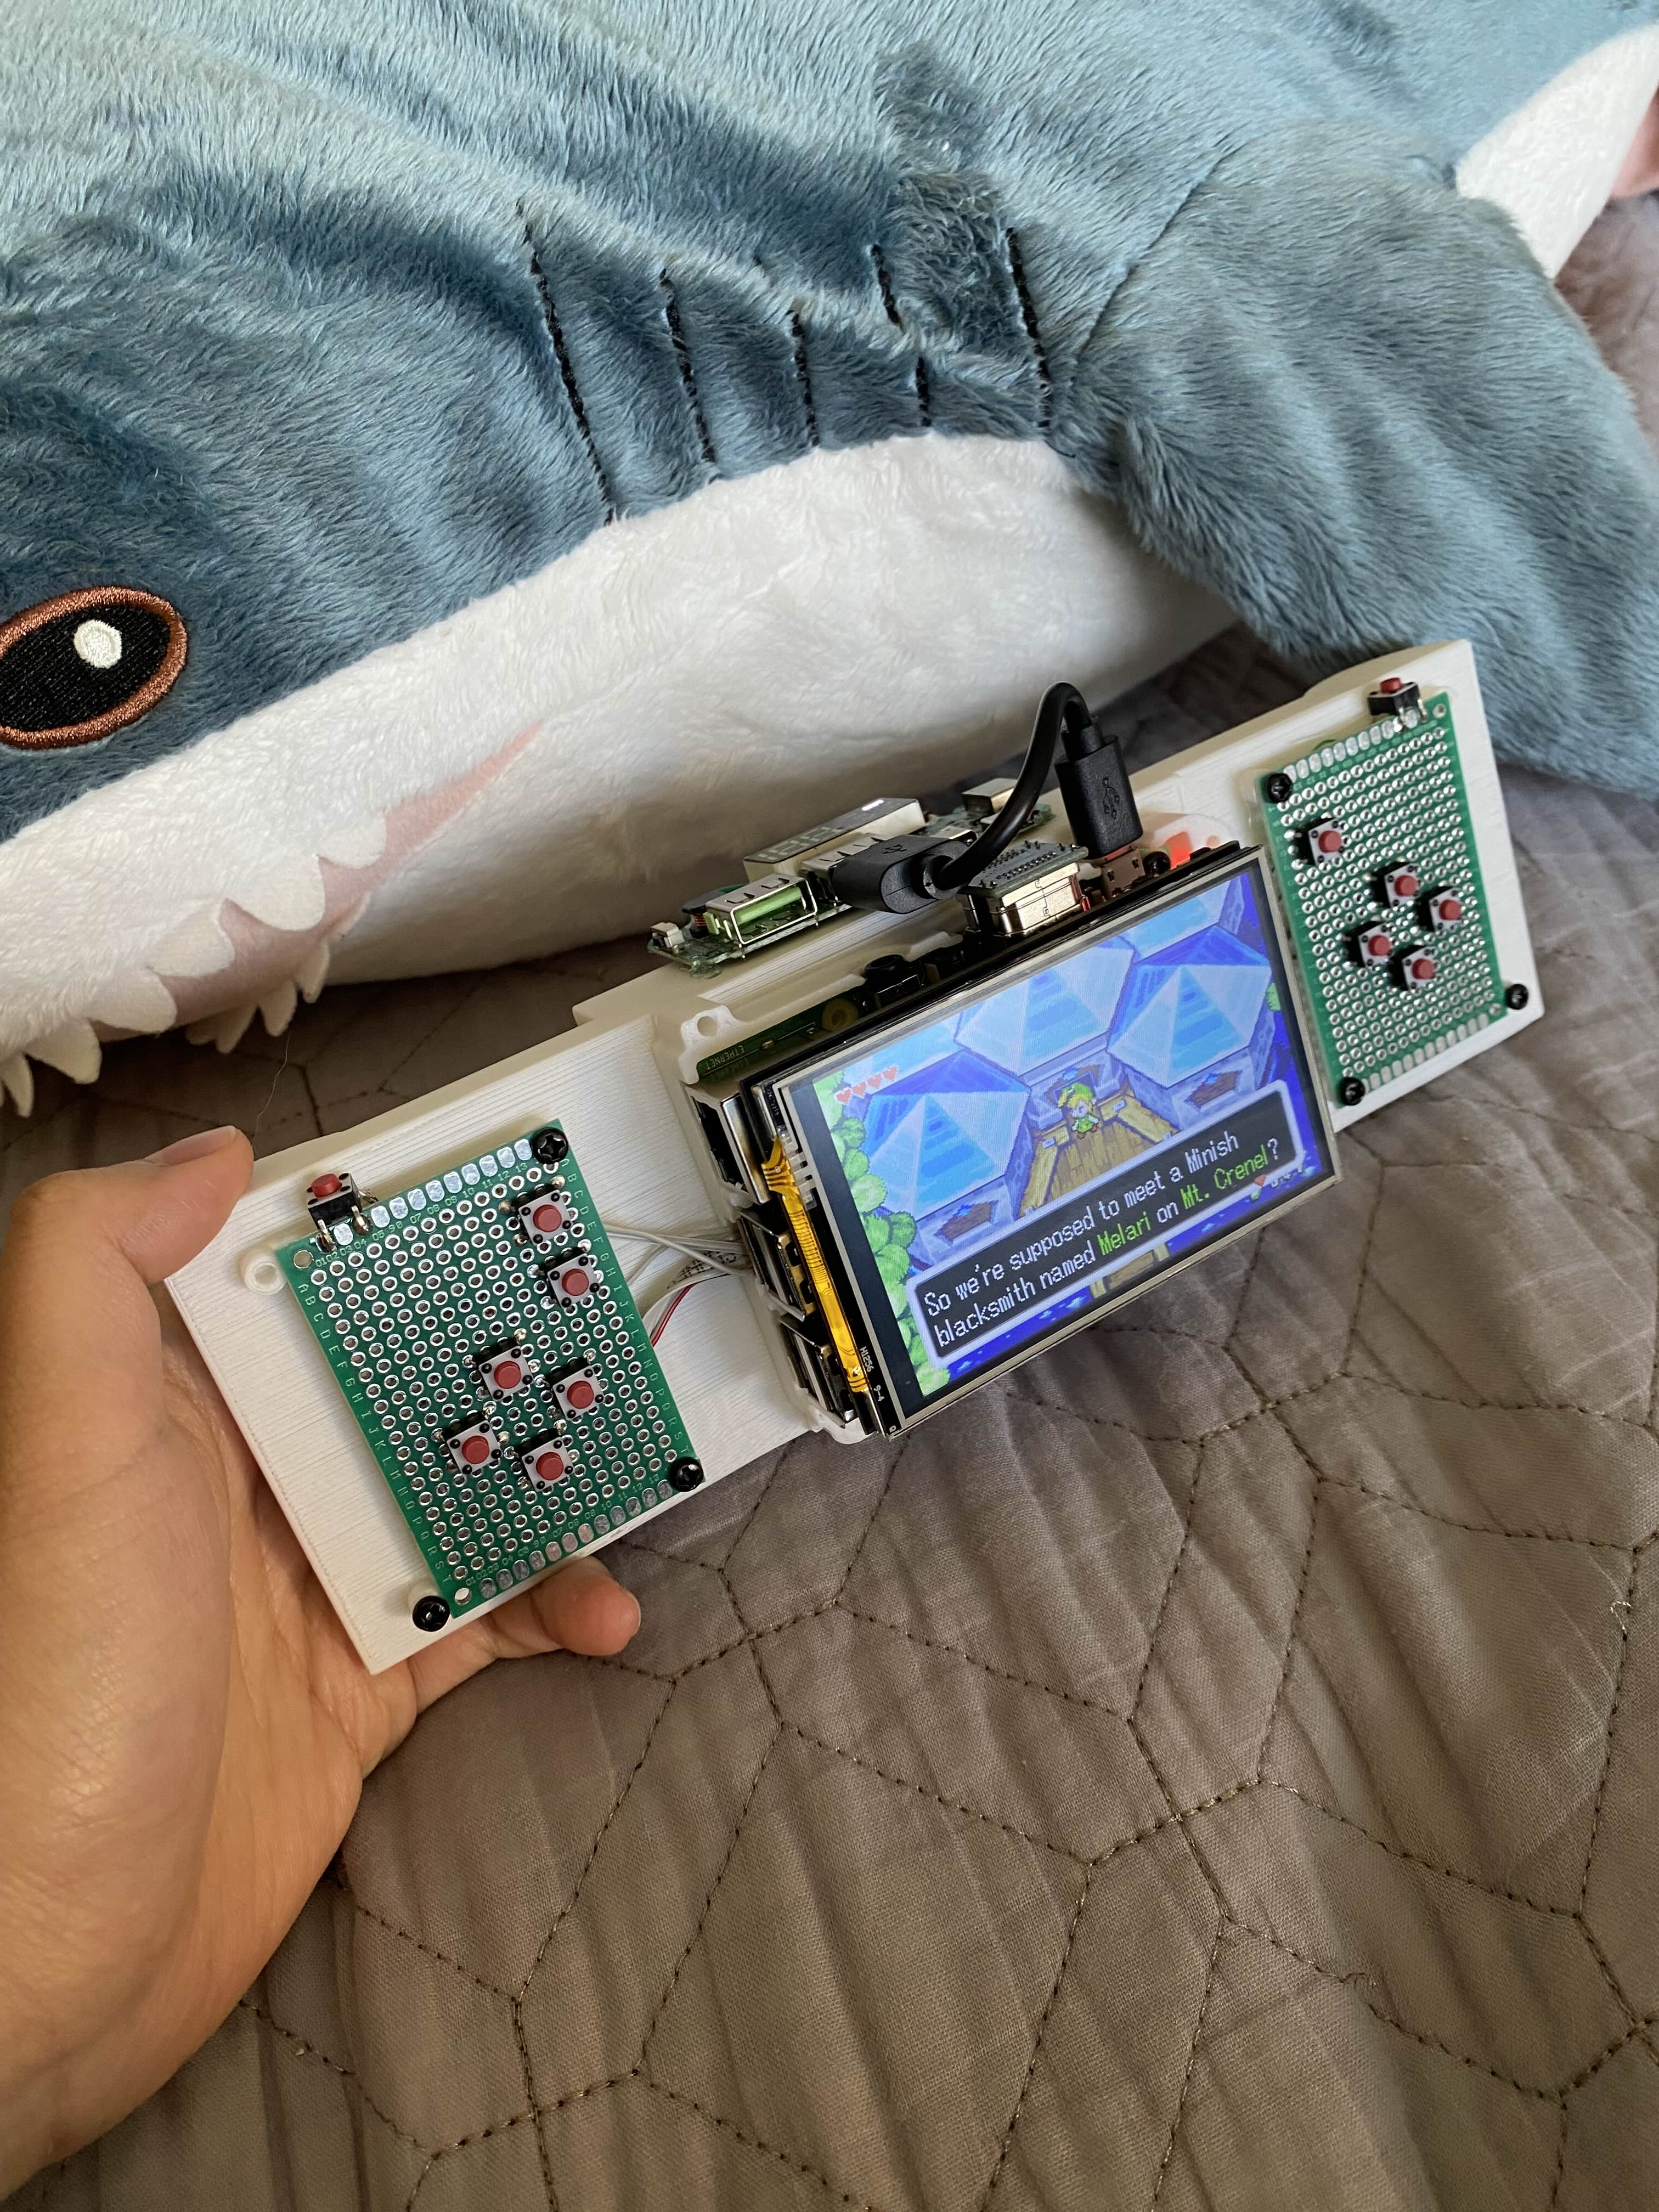
The first hurdle was the controller. I wanted to use some buttons my dad has (he's an electrical engineer so I got blessed with plenty of tools and parts),
but how the hell do I make the Pi read my inputs?? I know that the buttons need to be attached to the GPIO pins, but how can the Pi read which ones are pressed, and how do I translate that to inputs Retropie can recognize?
Sure, some skilled coder will probably write their own programs for it, but I am not a skilled coder by any means. Fortunately, those skilled coders put their programs out there open for everyone to use. I found one called GPIONext on Github,
and all had I had to do was SSH into my Retropie and run some git clone commands. Then boom, I'm able to configure my GPIO inputs by following some very simple instructions. Of course, along the way, I keep soldering the buttons to the wrong pins,
and made some very silly mistakes that I'm happy to escape unscathed from. For instance, I followed a diagram of the Pi 3's pinouts for my buttons, but I totally forgot that if you flip the Pi upside down to
solder onto its backside, the diagram needs to be flipped too for everything to match. What ended up happening is that some buttons were not soldered to ground and all of them were attached to pin 37 (or something I forgot).
Very funny looking back now, but I'm glad I didn't burn anything and create magic smoke.
The next hurdle was the screen. I had a past client who used to play around with single board computers, and he sent me some parts he no longer use.
Among them was a 3.5 inches GPIO hat monitor for the Raspberry Pi. And you, dear reader, might think, "Oh great, you got the part! Money saved and problem solved!" BUT NO!
I love this client, but the screen didn't work out for me. For one, any input through GPIO is going to be relatively slow since not a lot of data can be sent. That means
I was getting a max of 10 FPS with this monitor. For a gamer, that is a big no no. I wanted at least 20 FPS for my retro games. As I was looking up solutions online, I found that
people were mentioning that the very same GPIO hat monitor but at 3.2 inches works better. It's around the same size, but the resolution is smaller by a lot of pixels so it runs at a
better FPS. However, the real solution is actually to just use the Pi's HDMI port. There are monitors out there for the Pi that uses HDMI and comes with a small HDMI plug so it fits
right on top of the Pi without having an awkwardly long wire stick out. That's the one I ended up getting, but it costed me around $40, a crazy price for such a small screen.
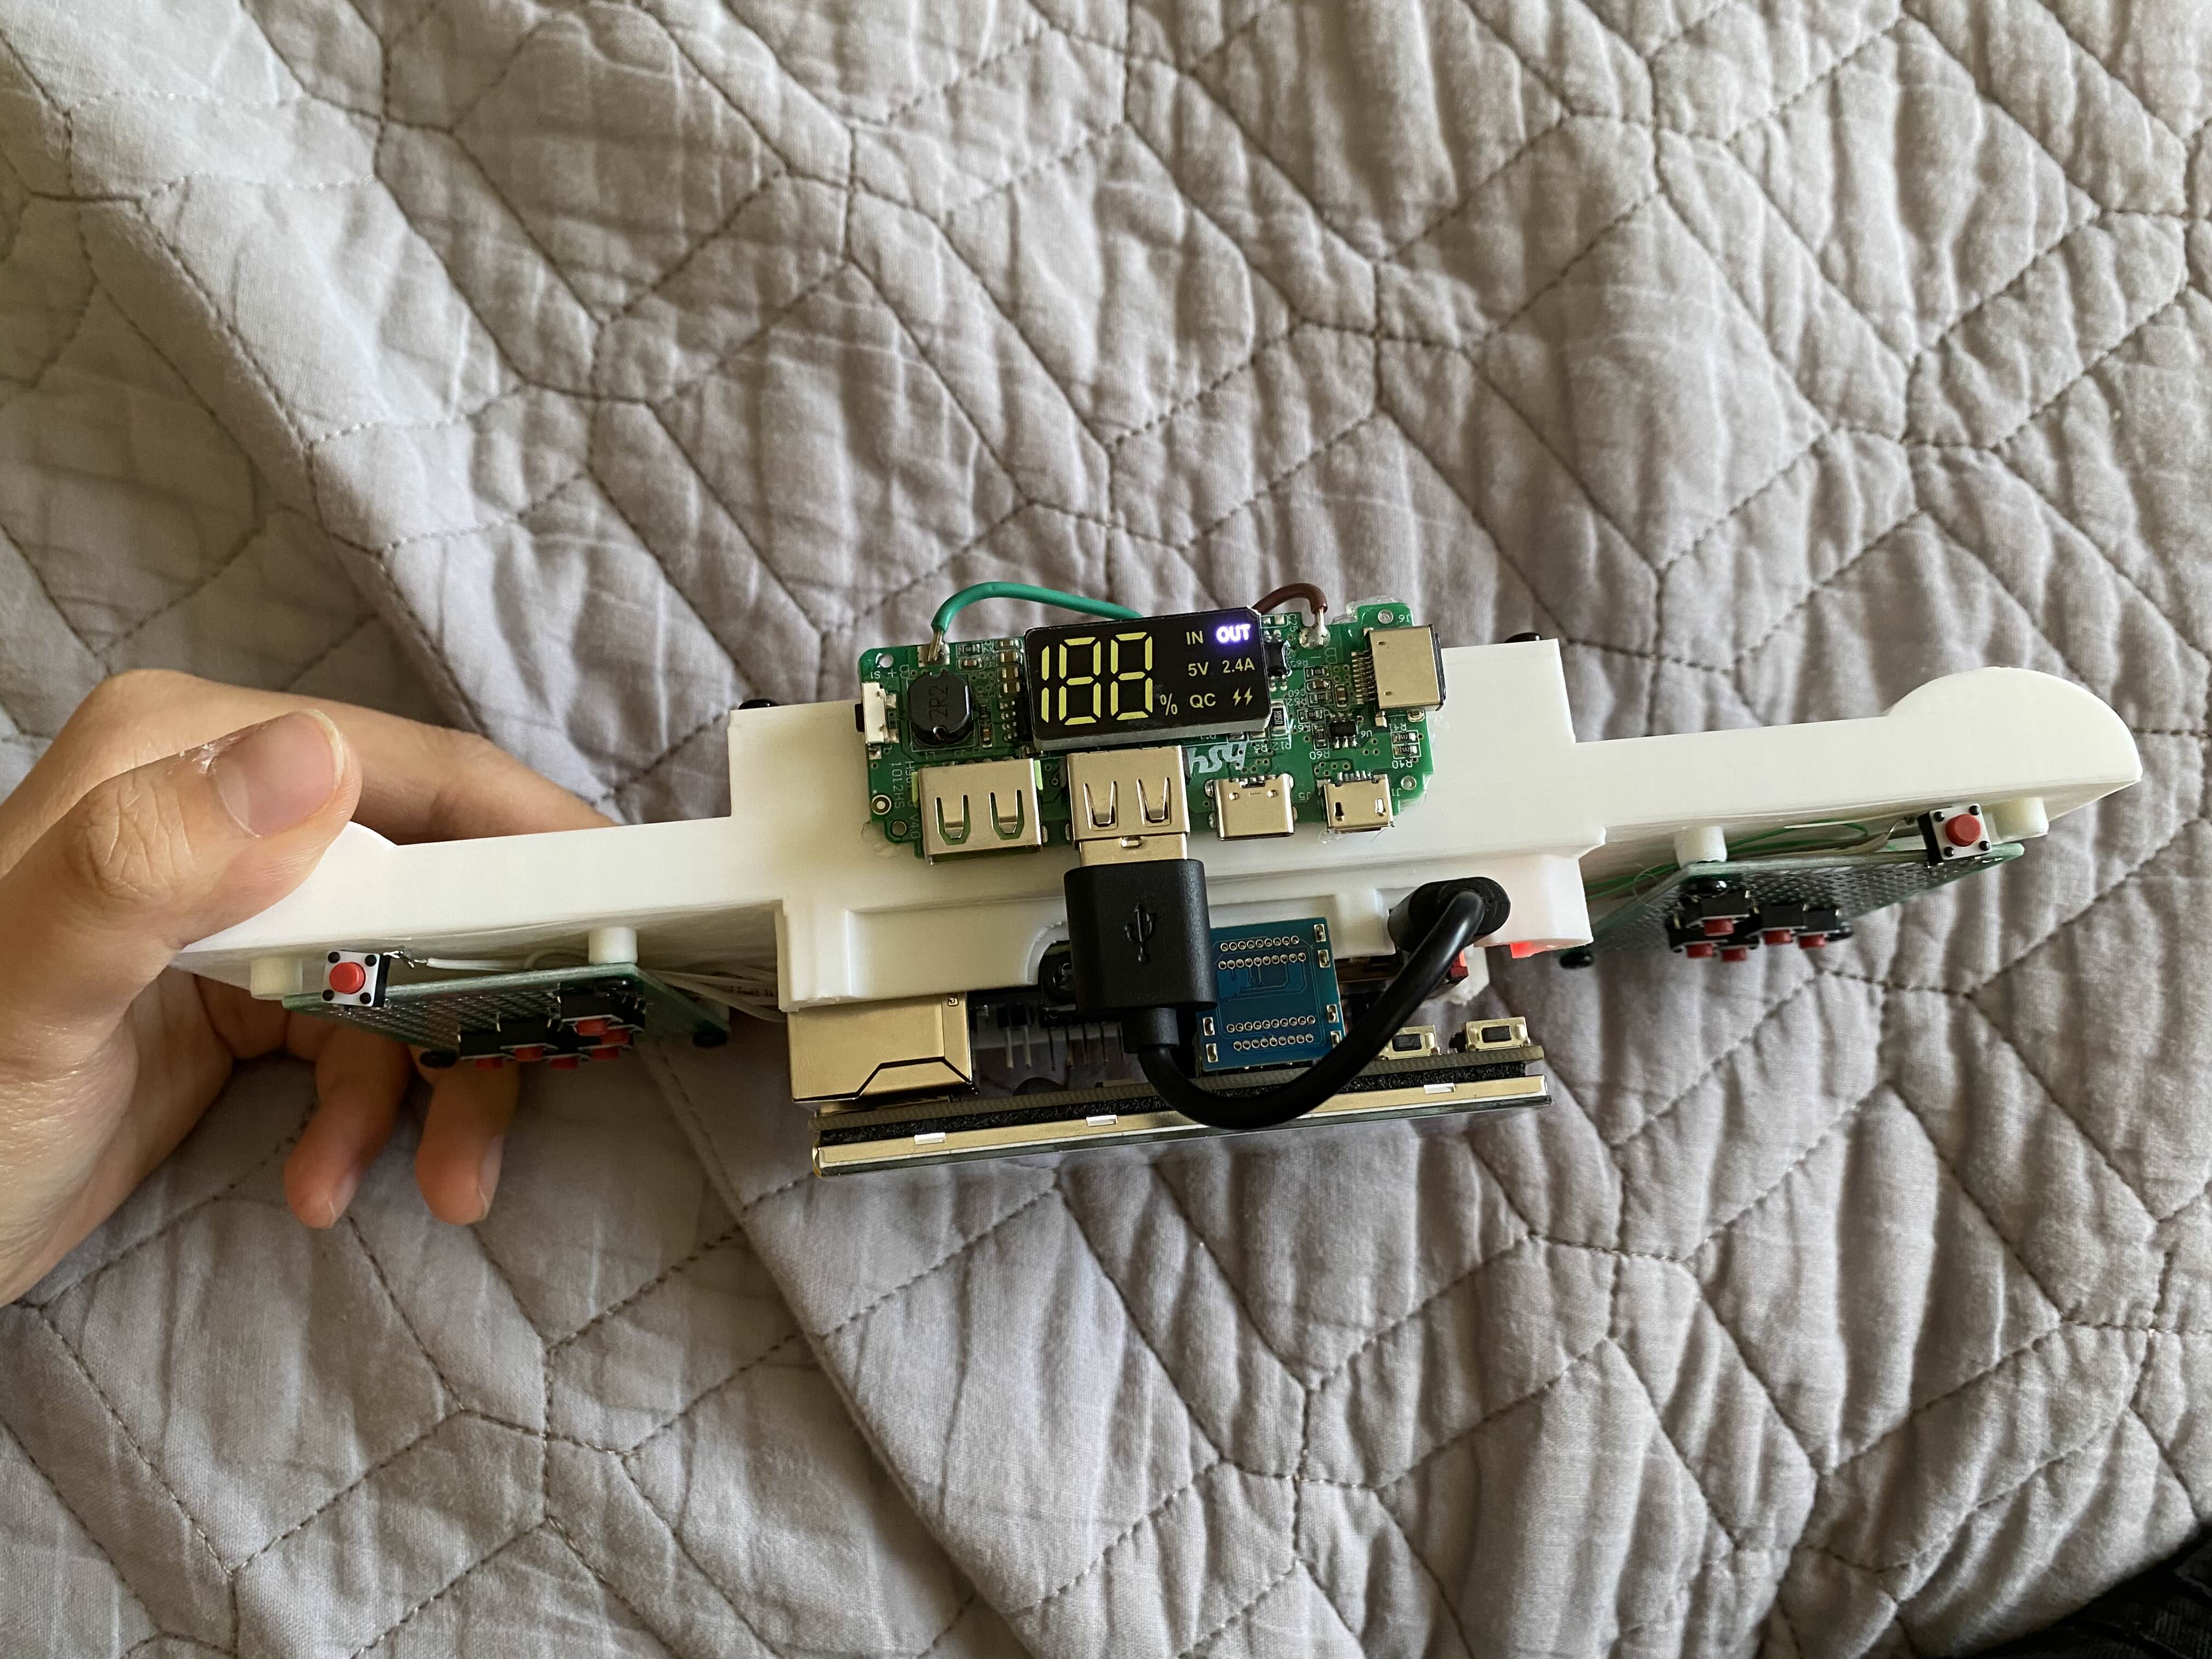
Since the whole device is meant to be portable. I needed a portable battery. This part was weird. It involved me contemplating incorporating a big clunky power bank to
considering sinking more money to get a rechargeable battery + the circuitry needed to convert 3.5V lithium battery for 5V use. But in the end, my dad just handed me a
lithium battery with the right circuitry for 5V, it even has a LCD screen that shows the percentage of power left. Problem solved... Where did he get the battery?
The 3D print part was the least skillful part of this project. I never 3D printed anything before this, and I made everything on TinkerCAD.
I grabbed a 3D file of a Raspberry Pi case from Thingiverse user 0110-M-P for the actual Pi to sit in, and then built off from there to include the other parts of my
custom handheld console. However, I don't know how measuring works in TinkerCAD or in real life, I ended up getting a lot of things wrong. But I was still able to stick with
my first print based on some clever maneuvering, it's not clean but it works. Maybe in the future I'll clean it up... but for now, this is good enough!
I could have added a speaker, but at this point of the project, my attention span was already low and I hear the mating calls of another project. So, I decided that
if I need the sound, I'll just connect my bluetooth headphones or plug in a wired headphone and call it a day. I'm so glad the Pi has an audio jack!